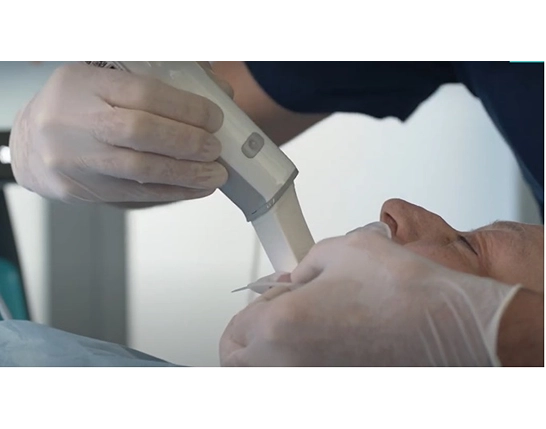
Intraoral scanning is often marketed as if the scanner itself is the decisive factor.
It is not.
The scanner matters, of course — speed, field of view, depth of capture, processing, and software all influence performance. But in daily clinical reality, the protocol matters just as much. In many cases, it matters more. A highly capable scanner used with a weak strategy can produce unstable data, stitching errors, distorted bite relationships, unreliable margins, and implant records that look clean on screen but fail under restorative verification.
That is why scan strategy should be treated as a clinical protocol rather than a casual hand movement.
And that is also why the most important distinction in intraoral scanning is not simply full arch versus quadrant, or fast scanner versus slow scanner. It is the difference between scanning teeth and scanning implants.
Those are not the same task.
Teeth are biologically irregular, visually rich, and naturally easy for software to recognize. Implant cases — especially multiple implants or edentulous arches — are geometrically sparse, more dependent on scanbody quality and seating, and far less forgiving when data stitching drifts. What works beautifully in a dentate crown case can fail badly in an implant case, even when the operator thinks the scan “looks fine.”
That is the core message clinicians need to keep in mind when building scanning protocols.
Why scan protocol matters at all
Modern scanning systems are remarkably good at building models from overlapping images. But they still depend on recognition, continuity, and reference geometry. The software has to understand where it is, what it is seeing, and how new data should relate to what has already been captured.
In dentate cases, there is usually plenty of usable geometry: cusps, fossae, embrasures, incisal edges, line angles, gingival contours, and texture transitions. These natural landmarks help the scanner maintain orientation.
In implant cases, especially in partially or fully edentulous arches, many of those landmarks disappear. The software is left with fewer stable references, longer smooth spans, repeated cylindrical shapes, movable soft tissue, and a much greater risk of accumulated stitching error.
That is why official manufacturer guidance repeatedly separates scan strategies by indication rather than treating all scans the same.
3Shape’s official support material explicitly notes that scan strategies differ depending on whether the case is full arch, quadrant, or edentulous, rather than recommending one universal approach. Medit does the same, separating general full-arch guidance from scanbody workflows, implant scanning, and edentulous or All-on-X protocols. iTero’s implant workflow guidance also treats implant rehabilitation as a distinct sequence rather than a routine crown scan with different parts.
That separation is not marketing language. It reflects a real technical difference.

The basic protocol in dentate cases
When teeth are present, the protocol is usually built around continuity, coverage, and stable anatomical landmarks.
Official Medit guidance for full-arch scanning recommends building the main scan from the clearest occlusal surface first, then extending into anterior regions and the opposite posterior side, while maintaining a consistent view of occlusal, buccal, and gingival or lingual surfaces. Medit also recommends tilting the scanner tip about 45 degrees during buccal and lingual capture and keeping the scanner aligned with the tooth axis at proximal surfaces.
In practical terms, dentate scanning protocol usually works best when it follows a few rules:
1. Start where the anatomy is richest
Posterior occlusal surfaces are often the safest anchor because they provide strong geometry for the software to lock onto. Cusps, grooves, and fossae are useful reference points. Starting on smooth anterior facial surfaces is much less stable.
2. Build a continuous path before chasing detail
The first goal is not perfection. It is continuity. Capture a reliable base path first, then return for detail where needed. Operators who repeatedly stop to fill tiny holes too early often destabilize the scan.
3. Keep the scanner moving with controlled overlap
A scan is not improved by random hovering. It improves when new frames overlap with existing frames in a predictable way. Sudden jumps, reversals, or spinning around isolated teeth are common causes of double data and misalignment.
4. Slow down at the anteriors
Incisors are visually thinner and often less forgiving for alignment. Manufacturer guidance points toward deliberate management of anterior capture rather than simply sweeping through it at posterior speed. This is especially important around incisal edges and preparations.
5. Tilt deliberately for buccal and lingual capture
A dentate scan should not remain purely occlusal. You need enough side-surface information for margins, emergence, and bite alignment. Medit specifically recommends a roughly 45-degree tip orientation during buccal and lingual passes.
6. Capture enough gingiva for bite registration
Even in tooth-supported restorative work, bite alignment is more stable when the arches include enough surrounding gingival information. Medit’s full-arch protocol notes that insufficient vertical data can make occlusal alignment harder.

In short, dentate protocols are about efficient continuity through rich anatomy. The software has many landmarks available. The operator’s job is mainly to preserve alignment, avoid holes in critical zones, and maintain surface diversity.
Why implant protocols are different
Implant scans are not just dentate scans with scanbodies added.
That is the mistake that causes trouble.
In implant cases, the scan is no longer only about surface topography. It becomes a positional record. The geometry captured must support a library-driven restorative workflow. Small errors matter more because the endpoint is not simply a model of anatomy. It is a prosthetic relationship that must translate accurately to components, abutments, bars, or full-arch frameworks.
There are several reasons implant scanning behaves differently:
1. Scanbodies are precise reference objects, not casual surfaces
A tooth can tolerate some visual noise if the overall anatomy remains coherent. A scanbody cannot be treated that way. Its seating, orientation, and captured geometry directly affect how the software identifies and replaces it with the library component.
2. Implants often reduce or eliminate natural landmarks
The more edentulous the case, the fewer natural references remain to stabilize tracking. In multiple-implant or full-arch cases, the operator may be scanning across long tissue spans with repeated component shapes and very little distinguishing anatomy.
3. Soft tissue is less reliable than tooth structure
Mobile tissue, saliva, collapse after removing healing components, and changing emergence profiles make implant cases less stable visually and biologically.
4. Full-arch implant error accumulates quickly
A small local distortion can become a meaningful cross-arch discrepancy. This matters far more in implant prosthetics than in ordinary dentate scanning.
That is why implant protocols must be stricter.
Implant scanning protocol: what should change
Official manufacturer guidance strongly supports treating implant scans as a separate workflow.
Medit’s implant support materials break out scanbody workflows, scanbody scan strategy, AI scanbody matching, and All-on-X guidance as separate protocols. iTero’s official implant rehabilitation workflow lays out a distinct sequence for full-arch implant cases: scan the treatment arch with the provisional in place, scan the opposing jaw, scan the bite, remove the provisional, place scanbodies, scan the scanbodies, capture a high-definition scan of each scanbody, and then scan the provisional outside the mouth.
That is not just a software trick. It reflects the logic of implant scanning.
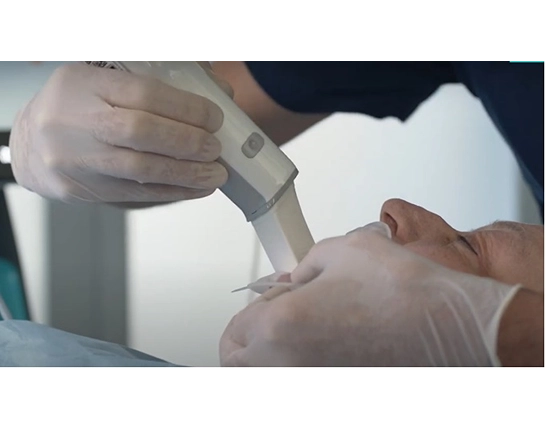
Here is what should change in protocol.
1. Verify seating before scanning anything
If the scanbody is not fully seated, the scan is wrong even if it looks perfect.
This is the first implant rule and probably the one most likely to be overlooked when teams become too comfortable with digital workflow. Optical capture does not correct mechanical mis-seating. The scanner will faithfully record a bad setup.
2. Control the field more aggressively
Implant scanning usually demands better moisture control, retraction, and soft-tissue management than routine dentate scanning. Reflections, pooled saliva, soft tissue collapse, and blood all reduce confidence in the data.
3. Use remaining teeth as anchors whenever possible
In partially edentulous cases, teeth are your navigation system. Use them. Start from stable dentate anatomy and approach scanbodies from known geometry. Do not jump directly into isolated implant components if stronger landmarks are available nearby.
4. Do not overwork a scanbody
One of the most common operator errors is circling a scanbody repeatedly because it feels safer. In reality, that often increases the risk of overlap, stitching noise, or confusion between similar objects. Implant capture works better when the operator obtains a stable approach, confirms recognition, and supplements only what is necessary.
5. Capture the emergence profile intentionally
Implant restorations are not only about the fixture position. Tissue contour matters. If the workflow requires soft-tissue architecture, that information must be planned into the scan sequence, not assumed to appear automatically later.
6. Use local high-detail passes where indicated
iTero’s implant workflow specifically recommends capturing an HD scan of each scanbody after scanning the treatment arch and scanbodies. That makes sense clinically: broad continuity first, then targeted refinement of critical prosthetic geometry.
7. Respect the difference between single implants and full-arch implants
A single posterior implant next to teeth is not the same challenge as six scanbodies across an edentulous maxilla. The protocol should not pretend otherwise.
Dentate versus implant cases: the real clinical difference
The most important difference can be summarized simply:
Teeth give the software many unique landmarks. Implants often do not.
That changes everything.
In dentate cases, the scanner is mainly trying to reconstruct anatomy. In implant cases, it is trying to preserve exact positional relationships using much less forgiving geometry.
That is why a crown on teeth and an implant crown may both be scanned in the same operatory with the same scanner, yet require different clinical discipline.
In tooth-supported cases, strategy is about continuity.
In implant-supported cases, strategy is about positional reliability.
A practical protocol for dentate restorative cases
- Dry and isolate the field.
- Start on a posterior occlusal surface with strong anatomy.
- Build a continuous occlusal path through the arch.
- Slow at the incisors and transition deliberately around the anterior.
- Tilt to capture buccal and lingual surfaces rather than staying flat.
- Return only for missing detail or critical margins.
- Scan the opposing arch with the same logic.
- Capture bite with adequate buccal and gingival context for alignment.
A practical protocol for implant restorative cases
- Confirm scanbody seating mechanically and visually.
- Dry the field and reduce reflection or contamination.
- Start from stable dentate landmarks if they are available.
- Build continuity before focusing tightly on each scanbody.
- Capture scanbodies with controlled passes, not repetitive circling.
- Add localized high-detail or HD passes to each scanbody where the workflow supports it.
- Record emergence and peri-implant tissue intentionally if required for the restoration.
- In full-arch or provisional-driven workflows, scan the provisional and supporting records in the order recommended by the platform or lab.
- Verify whether the case should remain an IOS workflow or move to photogrammetry, extraoral scanbody systems, or a verification step.
That last point is especially important.
A good protocol does not insist that every case remain inside one device. A good protocol chooses the capture method that preserves restorative truth.
Common protocol mistakes
- starting on smooth or unstable surfaces
- moving too fast through the anteriors
- chasing small holes before establishing continuity
- changing angulation too abruptly
- rescanning the same area excessively
- using too little gingival data for bite matching
- assuming a visually pretty scan is automatically an accurate implant record
- failing to verify scanbody seating before capture
- treating a full-arch implant case like a single-unit dentate case
What the best protocols really do
The best scanning protocols do not chase speed first.
They protect reference geometry first.
In dentate cases, that means using tooth anatomy intelligently and maintaining continuity through occlusal, buccal, and lingual surfaces.
In implant cases, that means respecting scanbodies as prosthetic reference objects, using every available landmark carefully, and recognizing when long edentulous spans demand a more controlled or even alternative workflow.
That is the real difference between a scan that merely looks complete and a scan that restores predictably.
And in digital dentistry, that difference is everything.
Official visual references
About the author