Before You Send the Case: A Digital Lab Transfer Checklist for STL, DICOM, Photos, Bite, and Notes
A surprising number of digital dentistry delays do not start with scanning or design. They start at handoff. The case may look complete in the clinic, but by the time it reaches the lab, one missing bite scan, one unclear shade note, or one mismatched file name can slow everything down.
Digital case transfer is only fast when it is structured. If the lab has to guess what is missing, interpret incomplete records, or request files in multiple rounds, the digital workflow immediately becomes less predictable.
This guide is a practical checklist for sending cleaner, more complete digital cases to the lab, with fewer emails, fewer remakes, and fewer avoidable delays.
Why the handoff matters more than most teams think
The scanner gets most of the attention in digital dentistry, but the handoff is where consistency is either protected or lost.
A case can break down for simple reasons:
- the STL arrives without a clear restoration objective
- the bite scan is present but not trustworthy
- the DICOM is missing for an implant-planning case
- shade information is too vague
- scanbody or implant library information is not specified
- photos do not match the requested outcome
- the lab receives files, but not the clinical intent behind them
Most of these are not technology failures. They are transfer failures.
The goal: make the case readable in one pass
A good digital transfer should let the lab answer these questions immediately:
- What is being requested?
- What files belong to this case?
- Which records are diagnostic, and which are definitive?
- Is the bite reliable?
- Is implant information complete?
- Are the aesthetics documented clearly?
- Are there any special design or manufacturing instructions?
If those answers are visible from the start, the case moves faster and with much less back-and-forth.
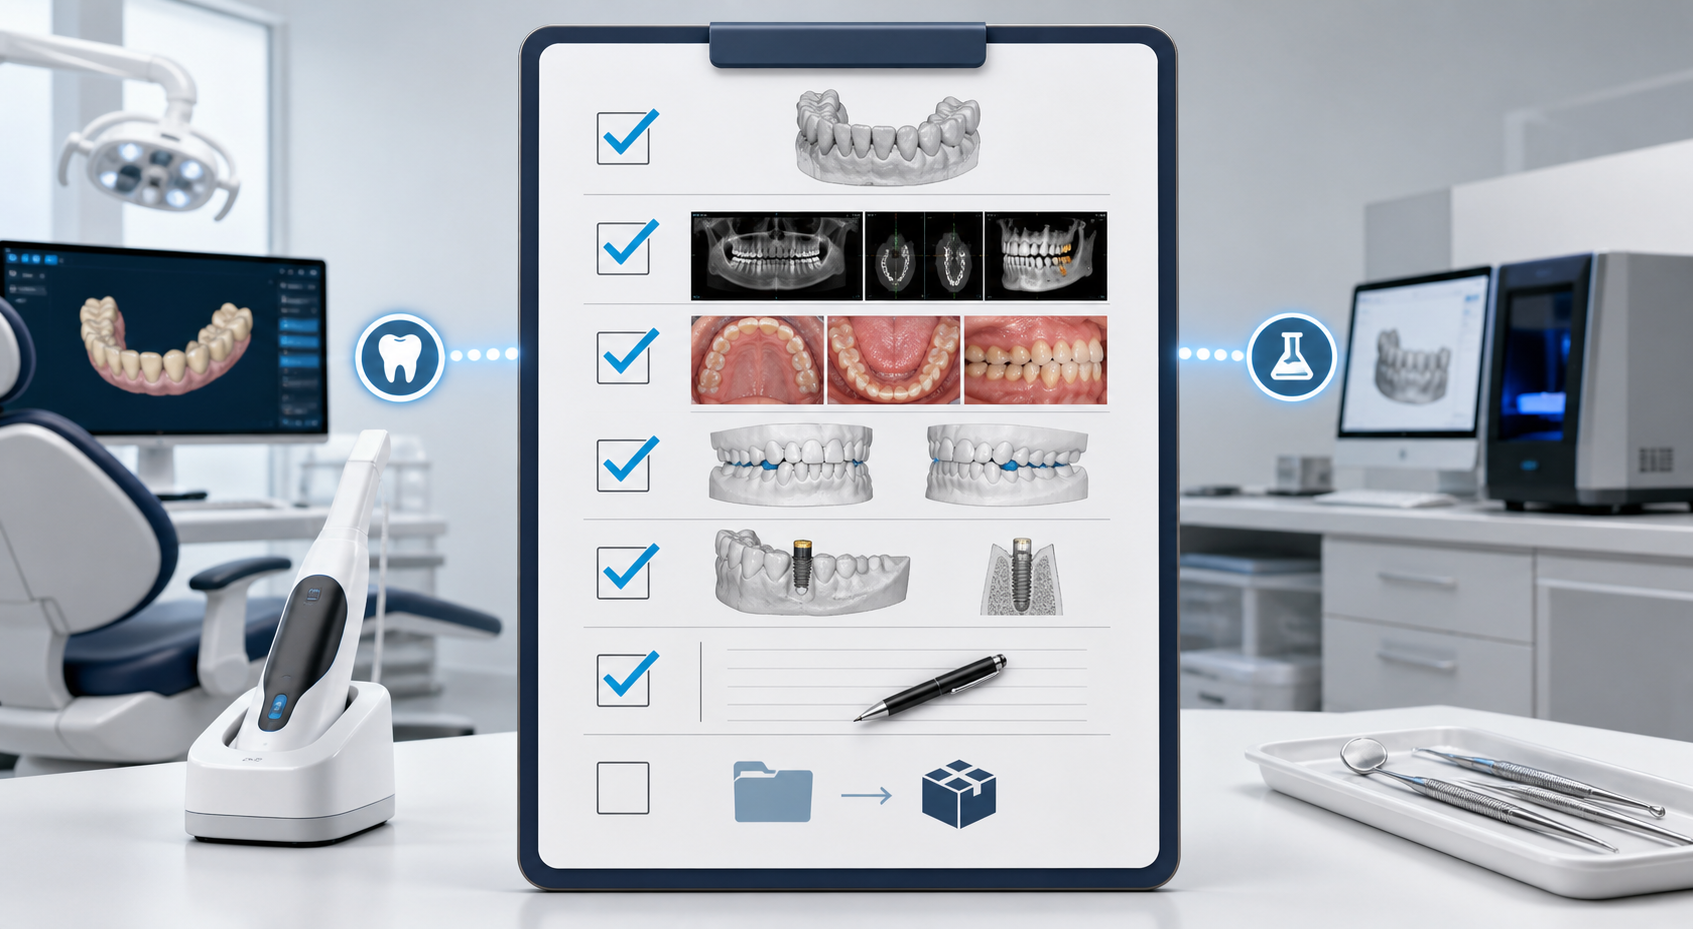
The core digital lab transfer checklist
1. Confirm the restoration objective first
Before sending any files, define the case clearly.
The lab should know:
- restoration type
- tooth or implant positions involved
- provisional or definitive intent
- material preference, if already decided
- cement-retained or screw-retained design where relevant
- whether the case is diagnostic, design-ready, or production-ready
If the objective is unclear, even perfect files can be interpreted the wrong way.
2. Clean up the STL export set
If you are sending STL files, make sure the file package is complete and named logically.
At minimum, verify:
- upper arch scan
- lower arch scan
- bite scan
- preparation or implant scan, if applicable
- soft tissue or emergence profile scan, if required
- wax-up or provisional reference scan, if relevant
Use filenames that are readable without opening the files. A simple structure is better than a complicated one.
Example:
- PatientName_Upper.stl
- PatientName_Lower.stl
- PatientName_Bite.stl
- PatientName_Scanbody.stl
- PatientName_Waxup.stl
Avoid sending files with generic names, duplicated exports, or multiple versions with no explanation.
3. Check the bite before sending
Many design problems begin with a bad bite record, even when the arches themselves look acceptable.
Before transfer, confirm:
- the bite scan aligns the arches correctly
- there is enough stable reference on both sides
- the patient was not scanned in an unstable closure
- the occlusal relationship matches the clinical situation
- there are no obvious stitching errors near the bite index areas
If you do not trust the bite, do not send it as if it were definitive. Label it clearly or rescan it.
A wrong bite wastes more time than a missing bite, because it can mislead the design process.
4. Include DICOM when the case actually needs it
Not every case needs CBCT data, but implant planning, guided surgery, reconstructive assessment, and some full-arch workflows often do.
When sending DICOM, check:
- the export includes the full dataset, not screenshots
- the scan belongs to the correct patient and date
- voxel quality and field of view are adequate for the intended use
- the file opens properly before transfer
- the lab knows whether the DICOM is for diagnosis, planning, guide design, or anatomical reference
Do not assume the lab can work from isolated image captures if the workflow requires the original dataset.
5. Add implant-specific information explicitly
For implant cases, never assume the scan alone tells the whole story.
Include:
- implant brand
- implant line/platform
- position and orientation notes if relevant
- scanbody manufacturer
- scanbody reference, if not obvious
- implant library source if the case uses a specific library
- whether the case is tissue-level, bone-level, MUA-based, or direct-to-implant
- screw access expectations or prosthetic constraints
This becomes even more important in mixed-library or aftermarket-component workflows.
6. Send photos that answer clinical questions
Photos should not be decorative attachments. They should solve problems before they happen.
Useful images often include:
- full-face smile
- retracted frontal
- right and left lateral retracted views
- occlusal views where useful
- stump shade or preparation photos when relevant
- provisional in place, if it defines contour or aesthetics
- phonetic or lip-support references in larger anterior cases
If the lab is expected to deliver aesthetic value, it needs visual information beyond the STL.
7. Write notes for decisions, not descriptions
Good lab notes are not long. They are specific.
Useful notes clarify:
- what matters most in the case
- where compromise is acceptable
- what must match the provisional
- what should be adjusted from the provisional
- margin, contour, contact, or emergence priorities
- timeline or appointment constraints
- whether the case is a try-in, prototype, or final
Bad notes repeat what the files already show. Good notes explain what the files do not show.
8. Verify file compatibility before sending
A case is not really ready if the files cannot be opened or matched easily.
Before transfer, confirm:
- file formats are correct
- compressed folders open normally
- no critical export is corrupted
- file names match the case
- there are no missing dependencies
- screenshots or PDFs are included only as support, not as substitutes for real data
This check takes a minute and prevents a long avoidable delay.
9. Keep one transfer route per case
Cases get messy when files are split across email, chat, cloud links, phone photos, and separate follow-up messages.
Whenever possible, send the case through one main route:
- one case portal
- one cloud folder
- one lab platform
- one organized email thread
If extra material is added later, it should be labeled clearly as an update to the same case.
Fragmented communication is one of the fastest ways to create design errors.
10. End with a final pre-send checklist
Before pressing send, run this quick confirmation:
- Is the case objective clearly defined?
- Are the upper, lower, and bite files included?
- Are file names clean and understandable?
- Is the bite trustworthy?
- Is DICOM included if the workflow requires it?
- Are implant details complete?
- Are the photos clinically useful?
- Do the notes explain intent clearly?
- Can the files actually be opened?
- Would another person understand the case without asking you a first question?
If the answer to the last question is yes, the handoff is probably ready.
A simple rule that improves almost every case
The best digital transfers do not just send data. They send context.
That means the lab receives not only the scan, but also the case intention, the bite confidence level, the prosthetic target, the implant information, and the aesthetic references needed to move forward without guessing.
That is what turns a digital workflow into a reliable workflow.
Final takeaway
Fast case transfer is not about sending more files. It is about sending the right files in a structured way.
When STL, DICOM, photos, bite records, and notes are organized properly, the lab can begin with confidence. That reduces clarification messages, shortens turnaround, and improves the chances of a restoration that fits both clinically and functionally.
In digital dentistry, cleaner handoff often matters just as much as cleaner scanning.
About the author